Campaign Overview
2026-05-08
Campaign Overview — Mindustry guide imported from fandom-mindustry
Source: Campaign (CC-BY-SA-3.0、 mindustry-unofficial Fandom contributors)
| *Under Construction***This section is currently missing some information and is welcome to contributors.
|
The campaign** is where the main storyline of Mindustry* takes place. Players start in a small sector and must slowly capture more and more territory in the face of the enemy. Over time, they can research new blocks, unlock advanced materials, and begin fighting back enemy bases, eventually conquering entire planets.
It is recommended to complete all landing zone sectors in the campaign before advancing to Custom Games or Multiplayer, to gain fundamental knowledge of how to build a base from scratch.
The planet, Serpulo.
Gameplay
The other planet, Erekir.
When starting the campaign for the first time, you will be prompted to choose which planet to begin in, although they can be switched at any time.
Serpulo is the planet that the campaign takes place on for most of Mindustry*'s history. It is more expansive and is in line with most multiplayer servers but has a weaker balance and less polish due to its age. The simpler mechanics here make it recommended for players new to automation games.
*Erekir is a new planet added in the latest major update, Version 7.0. Although there is less content, the gameplay is much more structured and combat-focused, which is highly recommended for those who enjoy other RTS games. In addition, it is more polished and balanced, albeit being more difficult than Serpulo.
Tech Tree
The Tech Tree is an interface where you can research new blocks to place down and expand your conquest of each planet. The resources you have across all controlled sectors contribute to a global items pool that can be spent on the tech tree.
Some items need to be "researched". To do this, produce the item using one of your item-producing blocks. Each planet will have its own separate Tech Tree, and any items that are shared between planets, such as  Graphite, will not carry over.
Sector Mechanics
Unless stated otherwise, all information below applies to both planets.*
Overview
Sectors are defined as the 'levels' of the Campaign. Each available sector is either unoccupied or has an enemy base; unoccupied sectors require surviving waves to capture, while the opponent's Cores must be destroyed to obtain enemy base sectors. Broadly, they can be categorized into landing zone sectors, which are pre-defined maps that unlock more items in the tech tree (indicated with a grey border), as well as * numbered sectors that are procedurally generated and optional for completion.
Enemy base sectors can send additional attack waves to nearby sectors (if Enemy Reinvasion setting is enabled), which will be marked as vulnerable*. Alerts are given when an additional wave is launched, but they can only come if there are not already waves in progress. If an enemy base sector is captured and then lost due to additional waves, it is converted into an unoccupied sector and the locations of previous enemy Cores become spawn points.
At any point (but preferably when the sector is captured), you can launch a Core to a new sector, taking resources from the departure sector's Core to start the process. Launching into sectors requires certain conditions:
Any sector can land on a landing zone sector.
- Numbered sectors can only be launched from adjacent sectors, regardless of whether they are a landing zone sector or not.
If the departure sector is away from the currently active sector, a random valid sector will be used to source the launch instead.
You will be prompted to select a type of Core equal to or lower than the that on the depature sectors. If you have an eligible schematic with a core, it can be selected and all blocks in it are taken from the depature sector's storage. Starting loadouts can be configured, with the maximum loadout being half of the selected Core's capacity, and are additionally taken from the departure sector.
Core schematics cannot be launched on Erekir, and item loadouts are determined by the map.
In the sector menu, there is an option to abandon a sector. Abandoning sectors works different between Serpulo and Erekir.
Abandoning a sector the player is currently in causes the Core to explode in an unskippable animation and the waves reset. If an enemy base sector is abandoned, it still become an enemy base sector (if you already capture it, it will still turn it to enemy base but with lower threat). If a player returns to an abandoned sector, some player blocks will be destroyed and appear as ghost blocks.
Abandoning a sector the player is currently not in would completely reset a sector. This would cause all player-built blocks to be destroyed with no ghost blocks left behind. The waves will reset, as well as the maximum wave count (i.e. a Low-threat sector with 34 waves due to a reattack by the enemy will reset to 19 if abandoned in this fashion). Enemy sectors abandoned in this fashion resets the sector to an enemy base. This is a way to reset sectors with hundreds of waves back to its original wave count, especially useful for players not wanting to defeat hundreds of waves in a sector they have recently lost. Beware that this might be a cheese strategy and might be subject to change.
Abandoning a sector in general causes the sector to be reset (i.e. all player-built blocks are lost, but blocks already in place before landing would stay (said blocks that were removed by the player would also regenerate)).
Background Sector Calculations
Sectors continue to produce resources and defend against waves in the background. Since it is not possible to render tens of sectors in-game, Mindustry uses an algorithm to calculate these details instead. Item gain and spending are calculated in minute-by-minute batches.
The algorithm uses this method to determine survivability for vulnerable sectors.
A path for Ground Units is carved along the map. This is the shortest route for a
 Dagger to reach the Core.
Each enemy wave is assigned a value based on the power of each unit. turrets along the ground route that have ammo add power values to the player's side.
A repair contribution is calculated for all menders along the ground route, this repair is subtracted from the enemy attack. The attackers do not get a repair value calculated.
Damage caused by enemy waves is randomised based on the similarity between both sides' power values. The repair contribution from menders will repair some or all of the damage.
If an enemy wave overpowers the defense in value, the sector is lost.
Sectors that show full survivability without a plus sign are not completely safe against loss. This is especially true for sectors above High threat (eg.
 Tar Fields, Desolate Rift, Planetary Launch Terminal)
Units add to the player's power level no matter where they are stationed on the map.
On Erekir, sectors cannot be switched while you are actively attempting to capture one, meaning that no background algorithms for defense apply, only those for per-minute production. If switching to Serpulo, enemy base sectors under attack in the background will eventually be lost.
Numbered Sector Generation
All numbered sectors on Serpulo (and even nonexistent Erekir ones) can be replicated through the editor's Sector Generate function with the seed 0. Most aspects of a map stay consistent with the seed, except for:
 Scrap ore generation, which has a 25% chance of appearing.
Derelict ruin generation.
Enemy base defenses outside of the Core.
Imports and Exports
The  Advanced Launch Pad, unlocked after defeating Extraction Outpost, can transfer resources across sectors. The
  Landing Pad is needed to receive items that are being imported into a sector. Export and import values are summarized as per-minute values in the background. If a sector that items are being exported to is lost, Launch Pads reconfigure to The Sun to maintain export rates by constantly running.
Campaign Difficulty
The difficulty of the campaign can be freely adjusted for a more relaxed or intense experience. There are five settings for enemy stats and four additional toggleable mechanics.
Difficulties
Each difficulty alters the following stats for the enemy team:
Health multiplier determines the health of enemy units.
Enemy spawn multiplier determines how quickly enemy units are produced from factories and reconstructors, as well as increasing the number of enemies spawned in waves (rounded down).
Build times are divided by the multiplier (e.g. 0.5x spawn doubles the time taken to build or upgrade), and item costs are scaled proportionally to maintain normal ratios.
- Wave time multiplier determines the initial and normal wave spacing.
Difficulty
|
Enemy health multiplier
|
Enemy spawn multiplier
|
 Wave time multiplier
|
Wave time multiplier
|
Casual | 0.75 | 0.5 | 2 |
Easy | 1 | 0.75 | 1.5 |
Normal | 1 | 1 | 1 |
Hard | 1.25 | 1.5 | 0.8 |
Eradication | 1.5 | 2 | 0.6 | Toggleable Settings
Enemy Sector Invasions enables enemy bases to launch attack waves.
Fog of War enables the mechanic to be on all sectors. Can be toggled off to remove the mechanic on Erekir.
Show Enemy Spawns makes enemy spawn points pulse on the minimap.
Unpredictable
Wave AI assigns random priority targets to all enemy units.
Factions
Main Article: Lore and Factions*
Mindustry supports up to 6 pre-defined factions, of which four are involved in the campaign: Sharded, Crux, Derelict, and Malis. Each team has a colour scheme applied to certain blocks, namely Cores, Containers, Vaults, Force Projectors, and the lights on units. In all gamemodes, the enemy team selected has an infinite unit cap to support wave spawns.
Sharded
The player team is named Sharded. Initially starting dormant in Ground Zero, a sudden event awakens the only Core and sets it on a mission to claim its ground against the enemy. They don a gold(#fad057) colour scheme.
Crux
The enemy team on Serpulo is named Crux. It is the dominant force and is potentially responsible for many past events, such as the Biomass Synthesis Facility breach. They don a red(#f9515e) colour scheme.
Malis
The enemy team on Erekir is named Malis. They don a purple(#a17de5) colour scheme and control many enemy bases here. Their units move more like an AI opponent on other real-time strategy games by gathering in groups and launching timed attacks, prioritising less defended areas.
Derelict
Derelict is a neutral team representing structures in disrepair. All blocks on this team do not function and there is a unit cap of zero. Enemy structures will be converted to this team, with random blocks destroyed, once all or nearby Cores are gone. The team dons a light grey (#b6b8c7) colour scheme, whereas on the minimap and block decals their colour is dark grey (#4d4e58).
Derelict structures can be fully deconstructed for free resources, or 'reclaimed' for the player by clicking on them or "rebuild" them.
Tips
Tips here apply exclusively to Serpulo.
General
When launching, * your loadout should be as plentiful as possible. Pack everything in - You will never know what may happen until you experience it.
Survival sectors function much like typical Mindustry games. For any Low threat sector, you can let the games capture the background. This will save you time to do other things. But as long as you see that the sector survives all waves in the background without a scratch, you can leave it be.
If you find that certain ammunition is too difficult to manufacture on-site, prioritize capturing Extraction Outpost to unlock the Advanced Launch Pad. Launch lots of resources into a sector undergoing capture.  Blast Compound is a great material to ship as it is used in several powerful turrets (i.e.
  Swarmer) and can be loaded in
  Air Units for destructive landings.
For power, RTG Generators are one of the most reliable power sources. They are efficient, conservative on fuel use, and can be easily tiled for massive amounts of energy, while using thorium brought from the loadout. Make sure you have lots of  Phase Fabric to construct them.
Never be satisfied with your defence. Most of the time, wave progression has massive spikes such as suddenly spawning in Tier 4 units. Build lots of  Mono,
Mono,  Poly , and
  Mega to accelerate your building and automate your basic resources.
 Thorium is the best mid-game wall material, as it is a mineable ore, high health, and not used in too many items for this stage of the game. Put it in front of
  Plastanium Walls for tanking bullets so the Plastanium Walls only take laser hits.
Powerful, reliable turrets such as the  Cyclone,
  Spectre, or
  Lancer are the best options for defense, while later on, the
  Foreshadow will guarantee prolonged survival.
Finally, take down enemy attack bases as soon as possible, especially in the case of Nuclear Production Complex. They will eventually overtake you and the new waves are mandatory for recapture.
Attacking Bases
Main article: Attack*
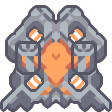
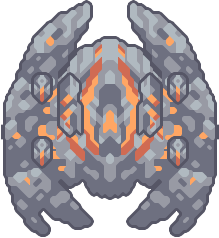
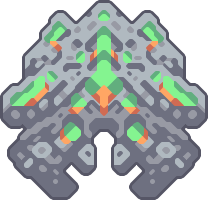
Units that are great in the campaign are the  Nova,
Nova,  Horizon,
  Zenith,
  Antumbra,
  Quad,
Quad, 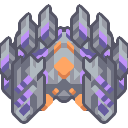 Arkyid,
 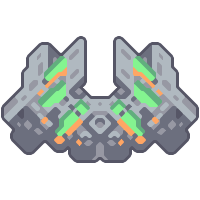 Corvus,
 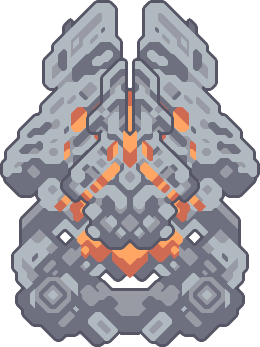 Omura , and
 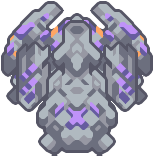 Toxopid. Each of these units has either great range, mobility, or damage which are essential in Player vs Enemy situations.
If you have unlocked the  Overdrive Projector and
  Overdrive Dome, these are essential for your unit construction. Plastanium Conveyors can also help with the insane
  Silicon costs of high-tier units.
Make sure you prioritise killing off any enemy Core ships and Mega as they can become incredibly problematic later on; they can rebuild and repair structures respectively. Once all Cores are eliminated, you win. Killing off Cores also reduces the number of enemies spawned in waves.
Some of the most dangerous bases are balanced around relying on exports to produce everything. Use a wireless or unloader setup connected to your Core and make sure your material imports are enough. Knock them down quickly - the waves are fast and deadly, and you may encounter multiple Tier 5 enemies within the first 20 waves. Launch heaps of Silicon and  Titanium, as well as whatever your units need for building.
The Foreshadow and Spectre are some of the most dangerous enemy turrets; destroy them by commanding swarms of Quad or Arkyid. Pack Blast Compound into their inventory for death damage that may just take out the Core. If multiple Cores are bunched together, Tier 5 units are crucial.
A note for those attack sectors that have an enemy base adjacent to it, attack sectors have infinite waves, each getting harder and harder until a guardian comes. Prioritize these bases next to captured attack sectors as this can help keep your sectors safe. If you fail, don't worry. The waves will reset, and they will recapture the base, allowing you to attack again.
Unattended Sector Defense
Main Article: Unattended Sector Defense
Turrets and Menders have to be near the path taken by an enemy Ground Unit to count towards defense, the required range is roughly the range of the turret/mender + 8 tiles. Units can be anywhere.
For turrets, only damage, fire rate, and number of shots per volley contribute to defensive power, and range only counts to the extent that it allows the turret to hit the attack path. Area damage and fancy effects like
 Arc's boosted damage against wet units do not contribute. Turrets with high direct damage per second such as
  Duo,
Duo,  Scorch,
  Salvo, and
  Fuse tend to give the most value. Boosts from liquid and overdrive do count.
Ammo, power, and
Phase Fabric (for overdrive) supply are not accounted for, it is the state of the turrets when you leave that map that matters, so you can cheese the algorithm by building large numbers of turrets like Salvo with a grossly inadequate ammo supply.Menders and units capable of repair/building are very important to having a survivable defense, as "repair per second" directly counteracts the "damage per second" of the enemy, and between waves also contributes to repairing any damage caused by the wave. AI modes available to the unit or assigned to the unit are not taken into consideration. Basic tier 1 and tier 2 repair units like
Nova and Poly make a very valuable contribution and when massed will greatly improve the defense.It is worth noting that most of the fancy abilities of guardians such as long range and high regeneration rates are not accounted for in unattended defense, hence certain guardians are much more easily beaten unattended. However, if you leave the map after the guardian has already spawned it gets an enormous multiplier to its attack power.
Core Schematics
You can save Schematics with a Core in them. When launching into a new sector, you can then choose that schematic to start with. Core schematics have a certain eligible size:
 Core Shard schematics can be up to 13x13
 Core Foundation schematics can be up to 14x14
 Core Nucleus schematics can be up to 15x15
It is recommended to have the following in a late-game Core schematic:
RTG Generators, for immediate power.
- Mono and Poly production, to handle early resources and blocks with long build times. Polies also double as a standing army for early defense. Megas can also be feasibly used, but will take up lots of space.
Production of one type of offensive unit, such as the
Zenith, on enemy bases.Vaults for additional input points to the Core.
Other
It might be useful to dedicate a certain sector for all of your exports. If you have multiple sectors with Launch Pads and are tired of constantly setting them, an export sector using Unloaders will save a lot of time. The large amount of space in  Salt Flats is a great place to store and export resources, which can be kept up using
  Differential Generator or
  Impact Reactor power. This only useful on V7 as on V8, player can redirect export destination to 1 sector using the landing pad.
Serpulo Campaign Map
See: World map (Serpulo)
References
- ↑ Scrap has a chance of 25% of spawning.