Chemical Processing: Chemical Processor Guide
If you’ve unlocked chemical production and aren’t sure how to turn it into a reliable part of your factory, the challenge is usually the same: getting fluids moving cleanly, keeping the Chemical Processor supplied, and avoiding stalls in the chain. Start by treating chemical processing as a logistics problem first and a recipe problem second. Build the processor, wire in the right transfer path, and only then scale out to more recipes. This guide walks through the practical setup: what to prioritize, how to route fluid inputs, where the common bottlenecks are, and how to put the outputs to work.
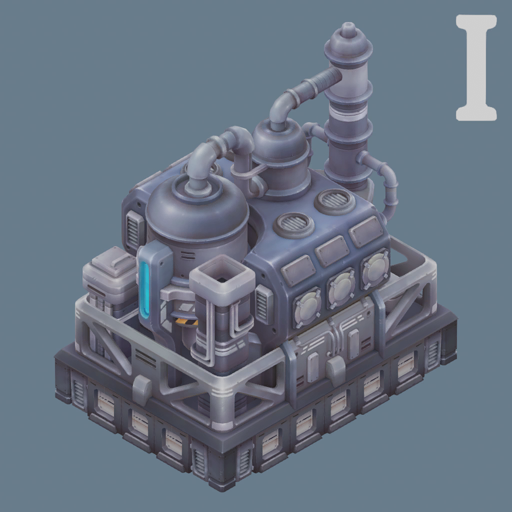
Unlock the Chemical Processor before you try to build the rest of the chain
The Chemical Processor is the building you need to anchor the whole setup. It performs chemical transformations as defined by its recipes, and it integrates into production chains through resource transfer systems such as conveyors, piping, or logistic links. Don’t start by laying down a large chemical district and hope the processor will fit later. Unlock the Chemical Processor first, place it where your transfer network can reach it cleanly, and then design the surrounding flow around that core.
The important mindset shift is this: chemical production is not a standalone side project. It depends on a stable processor hookup and the correct transfer method. If you build the inputs and outputs before you have the processor available, you usually end up rebuilding the layout once the real recipe connections are known. Save yourself that work and make the Chemical Processor the first commitment.
Set up fluid handling first so your chemical recipes can actually run
Fluid handling is the first real gate in this subsystem. 
The Chemical Processor connects to resource transfer systems according to its configured recipes and connections, so place it where both the input side and output side can stay clear. If you want steady production, the fluid line has to be steady too. When a chemical line stalls, check fluid delivery first. A broken pipe, a poorly buffered tank, or a connection that cannot keep up will look like a recipe issue until you inspect the routing.
Here’s a quick reference for the core chemical-processing recipe timings you’ll want to plan around:
| Recipe | Time |
|---|---|
 |
8s |
 |
120s |
 |
30s |
|
5s |
 |
8s |
 |
24s |
Use that table as a pacing guide, not just a list. The short craft times are the ones most likely to overwhelm a weak fluid line, while the long craft times are the ones most likely to become throughput chokepoints if you only build for bursts.
Choose the first chemical chain you want to stabilize
Do not try to wire up every chemical product at once. Pick one chain and make it stable from input to output before you branch out. If you have access to a fluid recipe such as Fracking Liquid or Olumic Acid, start there. Fluid recipes are the best test case because they force you to solve both sides of the system at once: delivery into the Chemical Processor and handling of the fluid output.
A good rule is simple: stabilize one product, then scale. If you start with the most awkward chain first, you spend your time debugging instead of producing. If you start with the easiest chain you can support, you get a working foundation you can reuse.
Solve throughput bottlenecks by matching the slowest recipe to the rest of the line
Recipe time tells you where the bottleneck will appear.
Build for the slowest step in the chain, not the fastest one. If you are feeding a short craft like Fracking Liquid into a larger setup, make sure the next stage can accept the output without backing up. If you are aiming at CPU, expect that line to move much more slowly than everything around it and give it room to sit on its own buffers. The mistake to avoid is building the whole line to the pace of the fastest recipe and then wondering why the entire system oscillates between full and empty.
When in doubt, keep the line simple. Add buffering where the output is faster than the next consumer. Add processor capacity where the recipe time is the limiting factor. Do not overcomplicate routing until the first version is stable.
Feed the Chemical Processor consistently instead of letting it oscillate between full and empty
The Chemical Processor is most useful when it stays busy. Your goal is steady supply on the input side and steady extraction on the output side. If inputs arrive in bursts, the machine will sit idle between deliveries. If outputs back up, the processor will stall even though the rest of the chain looks correct. Both problems waste time and make the whole setup look less reliable than it should be.
Keep the routing clean. Separate input buffering from output collection wherever possible, and avoid layouts that force the same path to handle both sides awkwardly. The Chemical Processor performs chemical transformations as defined by in-game recipes, so the machine itself is not the problem when a line becomes uneven; the delivery pattern is. If production pulses on and off, simplify the connections before you add more processors.
This is the point where many players overbuild. Don’t. A compact, predictable line with stable transfer is better than a sprawling chemical district that starves itself every few cycles.
Plan your chemical output around the products that justify the chain
Chemical processing should serve the rest of your factory, not sit off to the side as a curiosity.
If a chemical line is producing more than you can use, do not just add more processors and hope demand catches up. Either scale the consumer side first or back off the producer. Overproduction in chemical chains usually means wasted routing, clogged outputs, and a factory that looks busy while doing nothing useful. A better approach is to keep one chemical line fully integrated into the broader production plan, then add the next only when the first has a clear use.
The practical takeaway is simple: unlock the Chemical Processor, solve fluid handling, stabilize one recipe, and only then expand to the slower or more specialized products. That sequence keeps your chemical section from becoming a pile of half-finished infrastructure and turns it into a dependable part of your factory.