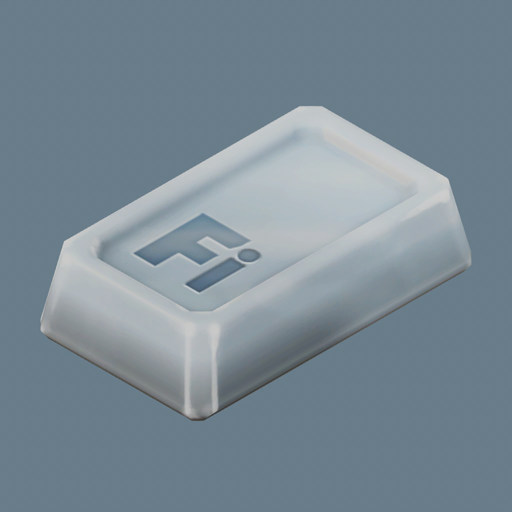
Lava Smelting: Firmarlite Bar and Science Pack III Guide
If you’ve reached the point where your next progression step depends on Firmarlite Bar and Science Pack III, the usual ore-to-ingot setup is no longer enough. This part of the game is really about getting the right late-game logistics online and keeping them fed.
Unlock the trade route before you try to produce Firmarlite Bar
Do not build around Firmarlite Bar until the station trade loop is actually available. Start by researching the Sales Warehouse technology. It appears immediately after Science Pack IV in the tech tree, but Science Pack IV itself is not required to research it, so you can move forward as soon as the path unlocks.
After that, place and fully construct a Radio Tower Base. This is not a “set it down and come back later” step; the tower needs to be fully built before station trading can begin. Then repair the space station cargo hold through the Radio Tower. Until that repair is done, the station side of the exchange is still effectively closed.
The key priority here is simple: research Sales Warehouse first, finish the Radio Tower Base next, repair the cargo hold last, and only then start building the logistics chain around Firmarlite Bar. If you skip ahead, you will end up with infrastructure that cannot actually produce the material you need.
Set up the three buildings that make Firmarlite Bar delivery work
Treat Firmarlite Bar as a logistics product, not a crafted one. You need three buildings online for the exchange to function:

All three must be constructed, powered, and configured before you test the route. If even one is missing, the trade chain breaks. The requester warehouse is where you receive the bars, the Sales Warehouse is where you offer the exchange item, and the Transport Ship Port is what physically moves cargo to and from the station.
A clean setup here saves a lot of troubleshooting later. If the station is repaired but the port is unpowered, nothing moves. If the warehouses are built but not configured, the route exists in theory only. If the transport network is active but the station has not been repaired, you still get nothing. Build the full loop before you expect any output.
Quick reference for the late-game build chain
| Item / Building | What to know | Time |
|---|---|---|
| Firmarlite Sheet | Recipe listed in the progression tree | 6s |
 |
Processing-category building; inputs and outputs are not specified here | 8s |
| Lava-Smelter II | Recipe listed in the progression tree | 15s |
| Science Pack III | Late-game research item with a long crafting cycle | 60s |
Configure the requests so the exchange can start
Once the buildings are in place, set the requests before you do anything else. In the Space Station Requester Warehouse, set Firmarlite Bar as the request. In the Sales Warehouse, set Maintenance Drone as the request.
That pairing matters. The first Firmarlite Bars are not made from raw material input; they are earned by sending Maintenance Drone to the station through the Transport Ship Port. The trade loop uses your drones as the exchange item, and the station converts that delivery into bars for you to collect.
Do not start by tuning transport schedules or expanding storage. Start with the warehouse settings. If the requester warehouse does not ask for Firmarlite Bar, or if the Sales Warehouse is not asking for Maintenance Drone, the trade loop will never begin producing the bars you want.
Watch the station loop until the first bars actually arrive
Once the route is active, keep an eye on the end-to-end loop. You feed Maintenance Drone into the Sales Warehouse, the Transport Ship Port carries them to the station, and the station exchanges them for Firmarlite Bar. Those bars stay in storage on the station until another Transport Ship Port collects them and delivers them to the Space Station Requester Warehouse, where you can withdraw them for use.
Your job is not to “make” the bars in a normal factory sense. Your job is to keep the exchange moving. If bars are not showing up, check the most common failure points in order: the requester warehouse setting, the Sales Warehouse setting, whether the transport route is actually active, and whether the cargo hold repair through the Radio Tower is fully complete.
This is the point where Firmarlite Bar changes from a material problem into a network problem. Once the loop is stable, you are no longer bottlenecked by smelting throughput; you are bottlenecked by how consistently you keep the station supplied and collected. Keep the route tidy and the bars will come in reliably.
Feed the new material into your late-game production line and buffer for long recipes
That becomes especially important once Science Pack III enters the picture. Science Pack III has a 60s recipe time, which means it is not a burst-friendly recipe. You will get much better results if you build for steady delivery and buffer stock instead of trying to run it on short spikes of input. In practice, that means keeping your Firmarlite Bar supply stable and avoiding the temptation to starve the line with frequent manual pullbacks.
If you want the cleanest progression path, think in this order: unlock Sales Warehouse, repair station access, build the requester and transport chain, configure the bar-for-drone exchange, then keep enough Firmarlite Bar flowing to support Science Pack III. Once that loop is stable, the rest of the late-game chain becomes much easier to scale.