Wall of Flesh
Overview
The Wall of Flesh is a pre-Hardmode boss that appears in the Underworld and marks the transition into Hardmode. It is an enormous horizontal barrier-like enemy that occupies the full height of the screen and steadily advances in a single direction, forcing the player to keep moving while also dealing with the Underworld’s usual hazards. It is commonly abbreviated as WoF.
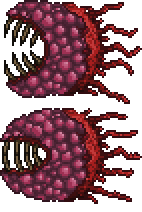
Its behavior becomes more dangerous as its health drops. The Wall of Flesh moves faster at lower health, and this increase is even more pronounced in Expert Mode. Its main body has a pair of eyes that fire Eye Lasers, and the lasers also become stronger, faster, and more frequent as the boss weakens. The mouth continuously spawns 

Because The Hungry scale up as the fight progresses, it is usually best to destroy them first before focusing heavily on the wall itself. They always drop Hearts when killed in normal mode, while in Expert Mode they only have a chance to do so and will respawn as long as the Wall of Flesh remains alive. The Tongue debuff can still pull players even if they are immune to knockback, so standard knockback protection does not prevent the boss from dragging the player back. In Journey Mode with Godmode enabled, teleporting away during the fight does not kill the player; instead, The Tongue can pull the player back to the Underworld.
A long, level bridge is the most common way to prepare for the battle, and it should extend for at least 1000 blocks. Solid bridges and platform bridges both work, but each has tradeoffs. Solid bridges block the lower eye’s lasers and allow bouncing projectiles to rebound, but they also block many of the player’s own attacks and do not allow dropping down to evade. Platform bridges let projectiles pass through and make it easier to attack the boss from multiple angles, but they do not block the lower eye’s lasers. In Expert Mode and higher, durable platform materials are preferred because dying Lava Slimes can destroy weaker platforms. If a bridge is not built, 

A few practical notes make the fight easier:
- The boss can only be summoned if the

- If the Wall of Flesh is accidentally summoned, leaving and re-entering the world despawns it, but any dropped items are lost and the player returns to spawn.
- If the fight is started close to dawn, it is sometimes possible to summon it again before the Guide’s respawn becomes a limitation.
- In worlds with the For the Worthy seed, the Wall of Flesh has smaller eyes and mouth, while The Hungry are larger and Fire Imps spawn throughout the fight.
- The boss can move toward the side of the world that is laterally shorter, depending on where the

The Wall of Flesh is notable for being one of the pre-Hardmode bosses with very high Expert Mode health, and it is also one of the few bosses that does not use the usual boss summon music behavior. Its visual design is strongly associated with its mouth and eye structures, and its loot appears at the mouth when defeated.
References to this (2)
Other entities of this type
- Alien Hornet
- Alien Larva
- Alien Queen
- Amber Bunny
- Amber Squirrel
- Amethyst Bunny
- Amethyst Squirrel
- Ancient Doom
- Ancient Light
- Ancient Vision
- Angler
- Angler Fish
- Angry Bones
- Angry Dandelion
- Angry Nimbus
- Angry Trapper
- Angry Tumbler
- Anomura Fungus
- Antlion
- Antlion Charger
- Antlion Larva
- Antlion Swarmer
- Arapaima
- Armored Skeleton
... +497 (see sidebar for full list)